
In this guide we show you in simple steps how to setup DMA. You will need:
DMA Hardware: Cheats – RadiantCheats
DMA Firmware: Cheats – RadiantCheats
Hardware Installation
– Turn off your main computer and unplug its power cable.
– Locate a suitable PCIe slot in your mother board
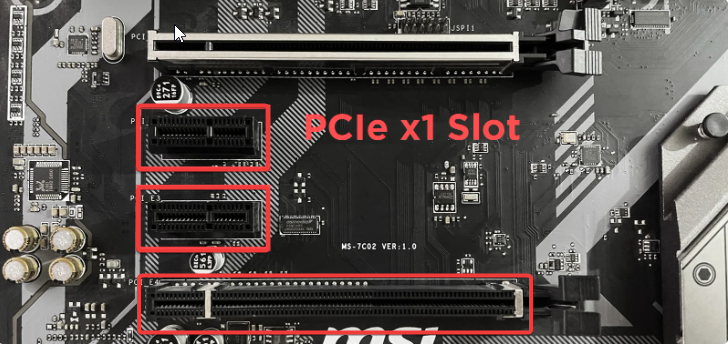
Gently insert the DMA Card into a PCIe slot. And make sure to screw the bracket into the case.
– Now connect the provided USB-C cable into your DMA Card’s DATA port and to your secondary computer using USB 3.0 or higher.
Make sure you have also enabled the card with the small swittch at the top right corner of the card. You should then see an indication light on the card.
BIOS Configuration
For AMD:
Disable IOMMU
Disable Virtualization & SVM
For Intel:
Disable Virtualization
Disable VT-d
Optional Settings (Both Intel & AMD):
Adjust PCIe slot settings for the CaptainDMA 75T: Set from Auto to Gen4 (if throughput issues) or Gen1 as needed.
Disable Secure Boot
Disable Intel Volume Manager (Intel only)
Disable Quick Start & Safe Start
Disable NX-Bit/XD-bit (if available)
Enable CSM (may help in certain scenarios)
Adjust PCIe slot settings for the CaptainDMA 75T: Set from Auto to Gen4 (if throughput issues) or Gen1 as needed.
Windows Pre-Requisites
Its recommended to apply similar BIOS and System Setings on both your main and secondary pc.
On main PC:
Disable Core Insolation
On the Secondary pc:
After both computers are powered on and connected to the DMA Card’s DATA port, verify that “FTDI FT601 USB 3.0 Bridge Device” is listed under Universal Serial Bus Controllers in Device Manager.
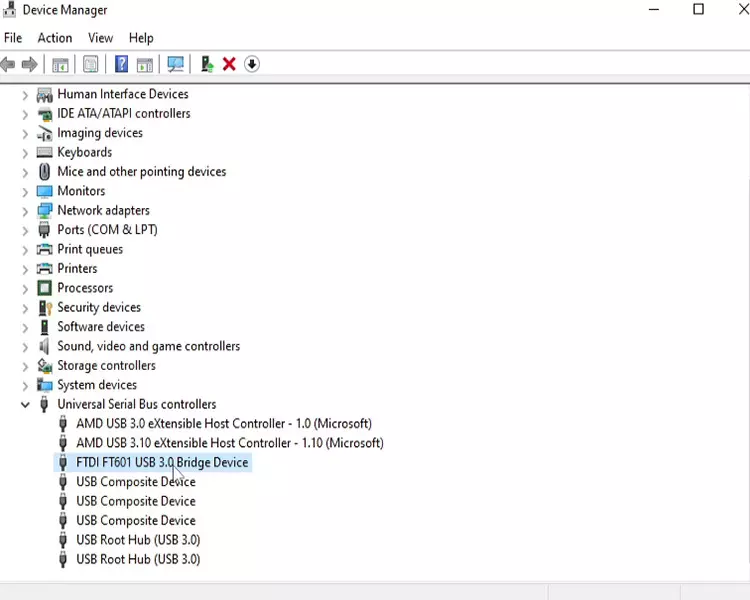
That means the card is successfully installed and working!
Now your ready for the next step, to install the firmware!
Guide can be found here: DMA Firmware Flash Guide – RadiantCheats
If you have any questions, just leave a comment here on this post below or contact us on discord.